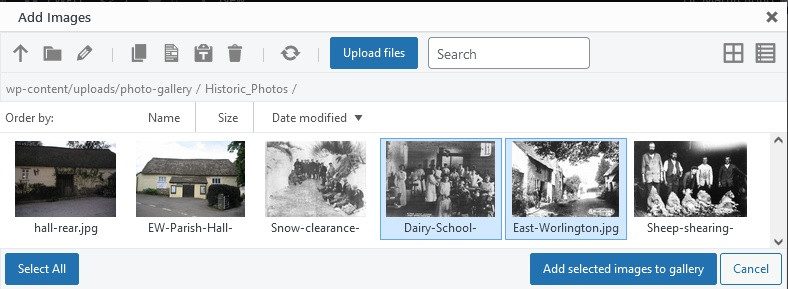
These guidelines for anyone scanning photos for uploading to the Photo Galleries into the Heritage Photo Archive.
Please use a high quality scanner to scan a photograph. There is a suitable Epson WF-7720 scanner accessible via the hall wi-fi. The scanner is located in the hall on the balcony above the stage. Both the Hall laptop and History group laptops are pre-configured to use this scanner. If you use your own equipment you will need to install a suitable driver from the Epson WF-7720 driver page.
Scanner
Lift the top of the Epson WF-7720 scanner to reveal the glass scanner bed.
- remove dirt and dust from the photograph by wiping clean with a slightly damp lint fee cloth
- place the picture on the scanner face down in the the top left hand corner
- scan onto the computer using the IfranView photo editor (preferred) or the Epson Scan software from the start menu (see below)
The Parish has a high quality CZUR ET16 Plus scanner designed for books and non reflective documents. It is not well suited to scanning photographs, especially those that are in any way reflective. Only try using this scanner if the results from the Epson scanner are of poor quality.
Please do not scan images with a hand held phone or camera. Your image will suffer from any or all of:
- blurring – camera shake
- parallax distortion – the image will not be square
- backgrounds – uncropped table surfaces
- colour variation – shadows from windows, reflections of artificial light
History Group Laptop
The history group laptop has suitable software added to the start menu.
- Epson Scan
- IrfanView is simpler and does a good job of colour balancing, removing sepia tones and sharpening images
- PhotoDirector is more complex but provides more advanced capabilities
Scanning
It is simpler to use IrfanView for everything – scanning and image retouching.
Start the IfranView photo viewer/editor from the Start menu identified by the icon below:
Use the menu File -> Acquire/Batch scanning option to display the following dialogue:
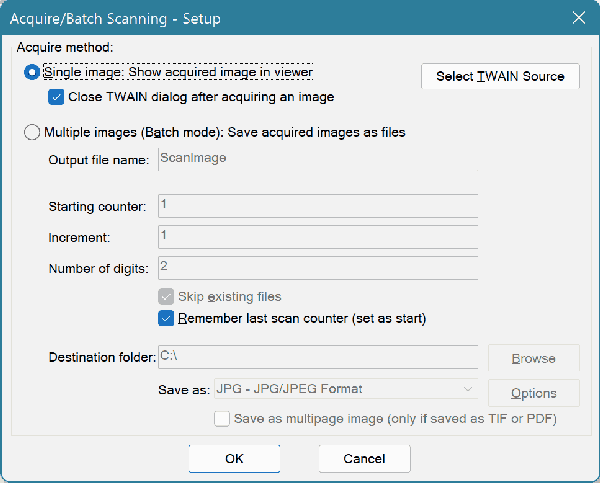
The Epson scanner should be configured as the scan source but if something doesn’t work click on the Select TWAIN Source button and select Epson WF-7720 from the list (it should be the only entry in the list). You only need to do this once.
Ensure that Single image option is selected (as above) and click on OK to start the Epson scan dialogue similar to the following (this image is from an Epson XP970 scanner):
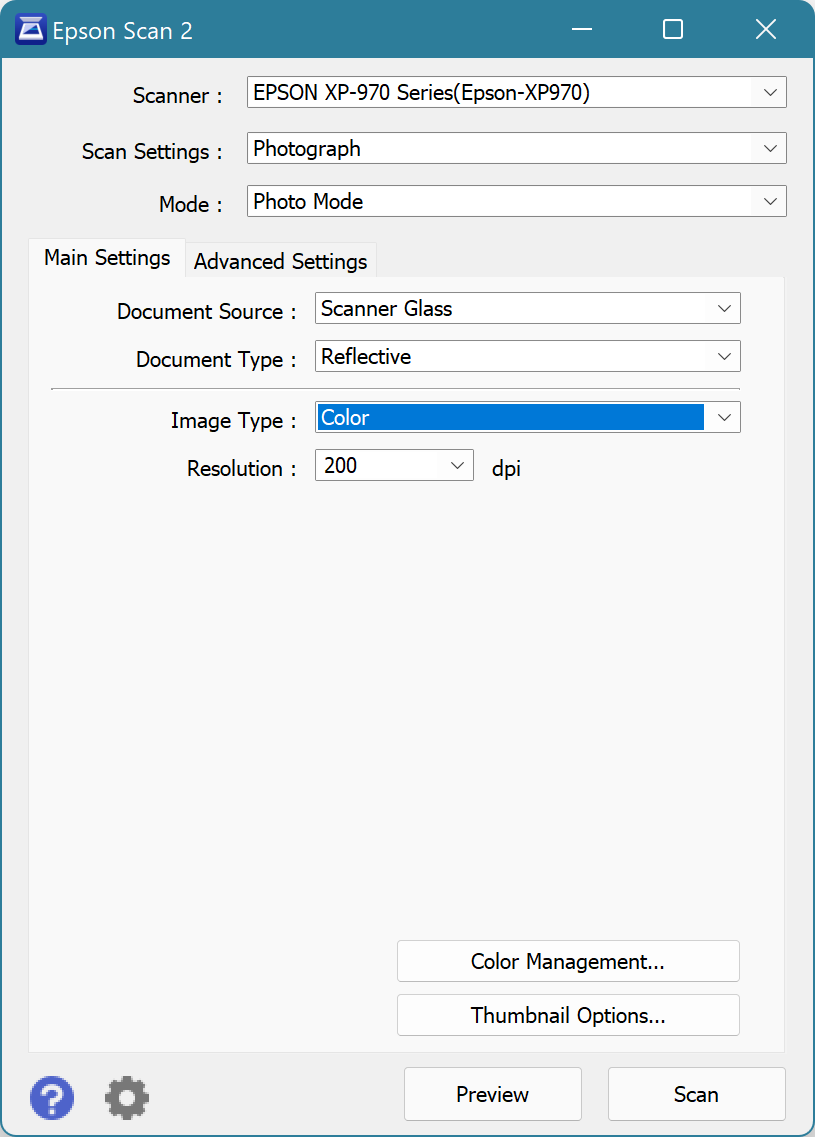
Click on Preview to do a quick scan to make sure you have the right photograph on the scanner and to set the correct scan settings. Check the settings as follows.
Image type
When scanning an image make sure you have selected the correct image type. The scanner should automatically detect B&W and colour photographs, if not select Grayscale (for B&W) or Colour as appropriate.
Image Resolution
The scanner uses the last settings for the resolution (usually 400dpi – dots per inch). Make sure you have the correct setting:
- 400dpi – produces HD quality scans suitable for computer monitors (recommended)
- 600dpi – high quality suitable for printing but are significantly larger files
Now click on Scan and your photo will be scanned into IrfanView. You will have a full A4 scan which has to be cropped.
Cropping images
Click and hold down the left mouse button on the bottom right of the image and sweep up and to the left to draw a box around the photograph. Release the left button and a box will be drawn around the area of the image to retain. You can adjust the lines of the box by moving the cursor onto the line and when the cursor changes to a black double headed arrow you can press and hold the left mouse button and move the line as required – release the mouse when the line is in the right place for your crop.
Press Control-Y or use the menu Edit -> Crop Selection (cut out) to crop the image.
Image Retouching
Use IrfanView to retouch the image (if needed) before saving or to modify an already saved file.
- Auto-adjust colors (Shift-U) will analyze the range of colours in the image to improve the tonal range, typically the image will look brighter – if you don’t like the adjustment use the Edit => Undo menu (Ctrl-Z) to undo the changes
- Sharpen (Shift-S) will sharpen up the image which can remove general blurring in old photographs, be careful because this can pixelate the image increasing the contrast making it look blocky and artificial – if you don’t like the adjustment use the Edit => Undo menu (Ctrl-Z) to undo the changes
- Color corrections (Shift-G) will let you manually adjust contrast, brightness, saturation and individual RGB colours (like you can on most TVs), try this approach if the auto adjust doesn’t give you a good result – you have to click on OK to save your adjustment to the original image but you can still use Edit => Undo (Ctrl-Z) to undo any saved changes
- Convert to grayscale (Ctrl-G) can be used on B&W images accidentally scanned in as colour images, it will remove any sepia toning
There are additional image manipulation options under the Image menu but these are less likely to be useful.
Make sure you save your changes to the file using the File => save as menu to save your file with a descriptive name. The filename is the default title for the image when added to a gallery so make sure it is readable (put spaces between words). Check when saving a file that you saving it as a JPG image which should be the default (IrfanView can convert images to different file formats if required).
Epson scanner software
As an alternative to using IrfanView you can use the Epson scanner identified by the icon below:
![]()
Start the scanner and click on the Preview button to scan scan the image. You will get a full A4 scan and will need to select the image part. Do this by clicking and holding down the left mouse button on a corner of the image. Drag the the outline box over the whole of the image you want to keep and release the mouse. You can fine adjust the lines of the selection box if they are not quite right (click-hold on a line and move up/down/left/right then release the mouse button). It is easier to crop the image using IrfanView which has a larger display window.
Click on the Scan button to save the image to an automatically generated filename and Windows File Manager will open to show you the folder containing saved file (unless the settings have been changed this will be the History subfolder in the Photos folder). You can double click to view the file and retouch as described above if required.
Uploading Photographs
You will need to login to the https://ewph.uk web site and select the Photo Archive Upload link available on that page.
Think of the photo archive as though it is a small art gallery. There are a large number of paintings kept in secure store in rooms at the back of the gallery. When you want to display a painting you take a photograph of the painting and it is this that is shown on the gallery wall along with a small placard with the painting’s title, category keywords and any additional information required. The placard information may be different each time a painting is shown.
The “storeroom” of the photo archive comprises a number of folders used to store the uploaded images. New folders can be created at any time but the following are provided for general use:
- Buildings
- Education
- Events
- Monuments
- People
- Religion
- WI
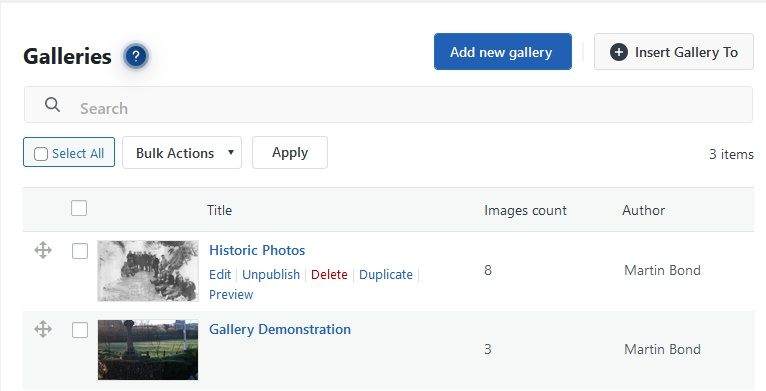
To upload a new photograph you must decide whether to add it to an existing gallery or start a new gallery. There are galleries already created for each storage folder so unless you have a good reason not to do so please add your photographs to the same gallery as the folder.
You always have to start by choosing to upload to a gallery before you can access the storage folders. In the art gallery analogy you have to enter the front door to see the gallery exhibits before you can go to one of the storerooms.
On the Galleries page for uploading photos you can choose one of:
|
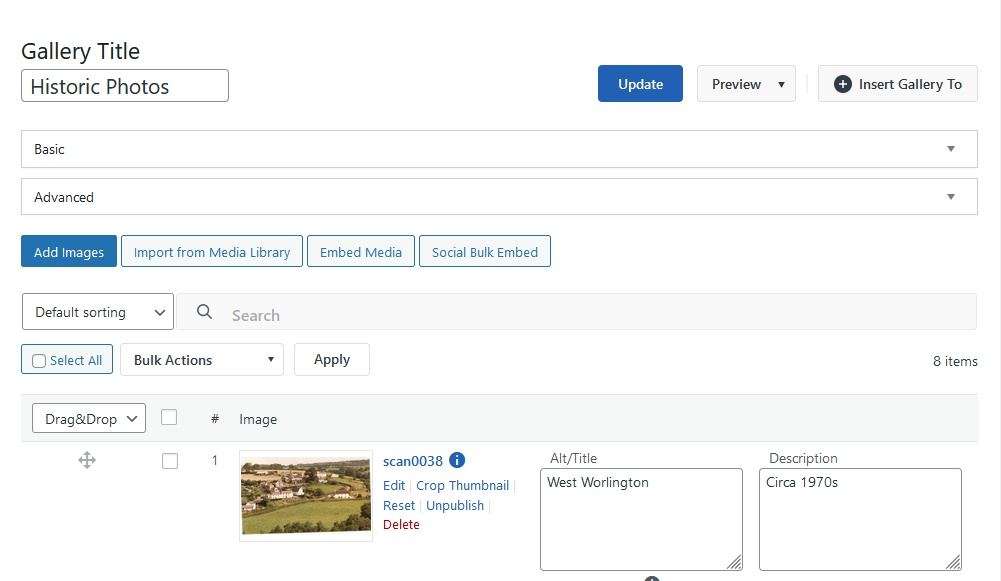
You will now be on a gallery page ready to upload your image or images to the storage area.
|
Click on the blue Add images button below the advanced information area – you may have to scroll the page to find this button. |
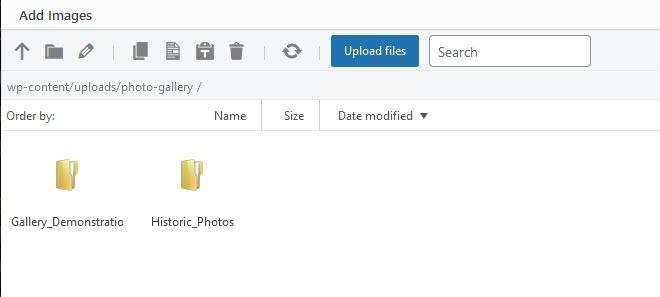
You will now be viewing the storage area for all photographs.
|
Please choose an existing storage folder, only create a new one if you have a special set of photographs to upload. Please do not put photographs at the top level but always inside a folder. Incorrectly placed photographs can be moved to a different folder but it is a slow process. There is a row of grey icons at the top left used when working with the storage are – hover over each icon to see what they do. Either:
|
Please note that you need to be disciplined when saving images to the storage area. There is no filename search mechanism so you must remember where you stored each image or choose self-explanatory file names. The search field you can see on the screen only looks in the currently selected folder.
Click on the blue Upload files at the top centre of the screen. On the popup window click on the Select files button and then browse to where you have stored you scanned image and select it. You can select multiple files by holding down the Control key as you click on each additional file.
Wait while the photographs are uploaded and stored. You will see a blue progress bar showing this happening and when all the images have been processed you will return to the storage area folder where you will see your images selected (highlighted in blue).
| Click on the Add selected images to the gallery to add these images. If you inadvertently deselect your images just click on an image to select it and then holding down the Control key click on each additional image you want to use. |
You will now return to the gallery with the images that you have added.
|
For each image you have selected you will need to to:
NOTE: there appears to be a bug where adding categories for the first time for a photo doesn’t work. You will see if the category was added correctly and if not, try again. |
The title, description and category tags are all used to search for images in the gallery.
|
Important: After annotating each image use the blue Update button (middle top) to save your changes – you will probably have to scroll the screen to find the update button. |
You can reorder the images using the 4-way arrow to the left of each picture. Click and hold down the left mouse button on the arrow image and then move up or down top reorder the images. Let go of the mouse button when the image is in the right place.
Use the Preview button by the upload images button to look at the gallery you have created.
To leave the gallery click on the Add Gallery/Images link in the dashboard options to the left of the screen – there is no exit button.
