An original article written for Creative by Liz Guppy a resident of East Worlington, a “sewer”and amateur textile artist.
I am a retired primary school teacher. I trained in the 1960s as a Home Economics teacher and taught textiles and cookery for some years before transferring to primary teaching. I always loved working with textiles in my classrooms and have made sewing and textile art my retirement hobby. This village project with the children in the village school was one that captured my imagination.
During the last few years our village community has been involved in a Heritage project to update and refurbish a wonderful 17th century thatched barn which is our village hall.
Funding had been obtained from a variety of sources, including the Heritage Lottery. The hall is the hub of village activities including the school of around 57 pupils which is located right alongside it so it was right that the children should be involved in the project.
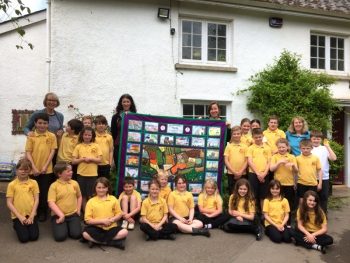
Another retired teacher and I started work with the children to produce a textile quilt which would show a map of the village centres with pictures of their listed buildings.
The children would learn some textile skills along with geographical and historical knowledge of their school area.
We started in October 2015 and the grand opening of the hall by the Lord Lieutenant of Devon was on June 3rd 2016. The quilt and a scrapbook showing the stages of work were featured and the children presented their work to over 150 people in a poetry format.
The processes leading up to this were many and varied.Mapping skills were learned and an enlargement of an OS map of the villages was made.
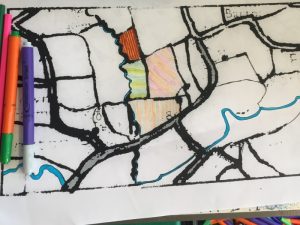
The children traced two base maps on to stitch and tear from the enlarged OS map. One was cut up into field sections and one kept as a pattern template. After looking at Google Earth and much discussion field patterns were designed on A3 paper copies of the map.
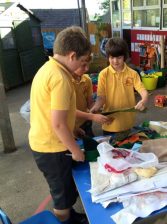
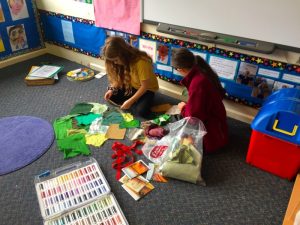
The fields were numbered and cut out of the stitch and tear. KS2 children (juniors) recreated them to make the map using hand and machine stitching.Field coloured fabric was sorted and chosen, then basic designs were made using softy wax crayons. The children decided which patterns would be hand stitched and which machined. We set to work first with needle and embroidery thread for hand stitching.
The fields were then positioned on the large stitch and tear template and pinned on. The KS1 children (infants) all had a field too which they chose fabric for, cut out and placed like jigsaw puzzle pieces on the large template.
When all the fields were in place I secured them with invisible thread stitched onto a cotton backing to create the basic map.
Once back with the children I taught them individually how to use my Janome machine to stitch special patterns on their fields. There were tractor tyre tracks, animal paths, footpaths, stone patterns, crop patterns, marshy areas and tree patterns. The boys were particularly interested in the sensitivity of the accelerator pedal for the machine and were very adept at control.Next the river and roads were positioned using brightly coloured sari ribbon. We made hedgerows out of sari ribbon and braid and again using invisible thread I stitched them all in place.
The second part of the quilt was to portray listed buildings of the villages so photos were taken of the buildings by the children. They then painted their own representation of their adopted building onto A3 paper. We reduced the size on the school photocopier to A5 and then I taught the children how to print their images onto fabric using my Epson printer. I had been on a course in 2014 with Ruth Brown to learn how to create digital imagery on fabric so this was a good reinforcement for me!The children liked ‘ fooling’ the printer by sticking cotton fabric onto A4 sized sticky labels. We did two on a sheet and when printed the children were able to enhance or brighten any parts with fabric paints and pens.
The background colour was chosen with the help of a colour wheel and complementary purple was chosen.A key and a title were designed on fabric using fabric pens. I then began many hours of stitching at home to put it all together. With Bondaweb and invisible thread the quilt was firmly made.
Thanks to Julia and Emily from Step by Step in South Molton and my sewing teacher and friend Jan Tillett for quilting tips!
It was a challenge but a great joy to see it all come together for the children.Finally the children wrote up their records of work and we mounted them alongside photographs and art work to make an A3 scrapbook which I covered.
On the grand Hall Opening day the children sang some songs and presented a rhyming couplet “rap” about the making of the quilt. Finally an eight year old recited a poem he had written entitled “The Dancing Quilt”. It was stunning!
The quilt will hang in the hall as a permanent fixture and the scrapbook will live in the school as a reminder of lots of fun and creativity.
Gallery of Activities
Click on a picture to enlarge and/or access a slideshow.
